It's time to get serious about cheesemaking. This month we're going to be making hard cheeses! The first steps are very similar to last month's cheeses as we'll be using mesophilic culture to acidify the milk and rennet to coagulate the milk. These hard cheeses are generally much more involved than the previous cheeses we made. From start to end of pressing can take several days. I usually like to start making a hard cheese on a Friday afternoon so that I'm done by Sunday. Of course you don't have to be actively doing something with the cheese that entire time, but you do need to be around.
It's also time to add to your cheesemaking equipment the cheese press. You can purchase them from various online retailers but I've found the best deal at Hoegger Supply Company. You'll need to also make sure to get the pressure gauge so you know how much pressure you're applying. The other option is you can make one fairly easily. We made it and it cost about $30 plus the 2lb cheese mold I had to purchase separately. This press doesn't need the pressure gauge. Instead we use old gym weights we found for the press. We'll be aging these cheese for longer so you'll want to also get cheese wax and a wax brush.
I'll be making one of these cheeses with you (names that aren't linked can be found in Home Cheese Making: Recipes for 75 Delicious Cheeses).
Farmhouse Cheddar
Cheddar
Leicester
Monterey Jack
Drunken Goat
Manchego
Cantal
Caerphilly
Good luck! This is going to be a lot of fun!
Monday, April 30, 2012

Saturday, March 31, 2012
Finding Your Whey - April: Moldy Cheese isn't always a bad thing
We're still working with soft cheeses so no need for a press yet, but you might want to start thinking about getting one or making one as next month we'll be starting with some basic hard cheeses. You will need some cheese molds (forms) though.
This month, however, we're going to be working with acid, rennet, cultures and mold! Yes, you heard that right. Mold. Mold is what makes brie such a wonderful gift from heaven. It's what makes blue cheese blue. Molds help the cheese develop more flavor and can also act as an inhibitor of undesirable mold. Some molds, like the ones for brie and camembert are surface molds while molds for blue cheese work within. They effect the color, smell, taste and texture of the cheese.
Feel free to experiment. Cheesemaking.com has some recipes for the more common cheeses like brie and blue cheese. Also Home Cheese Making: Recipes for 75 Delicious Cheeses has quite a few recipes you can check out.
I made Bucheron which is basically a camembert made with goat cheese and aged for an extra long time. The form is also different as it's more of a cylinder rather than your typical camembert or brie shape. This cheese doesn't have the soft gooey insides that the other two are known to have and the flavor is much stronger. I'm also planning on trying out brie.
This recipe was going to take 3 days to make so I made sure to do it on a weekend I was going to be home for. It required 2 gallons of goat milk which was going to take us quite awhile to stockpile. To stockpile raw milk we simply froze quart jars of it as we collected it until we got all we needed.
I had 4 small molds for making chevre, which ended up being enough. Five molds probably would have been more ideal though because I was really having to cram the curds into the four to make them fit. I also needed cheese mats, and a food grade plastic box to allow the cheese to retain moisture and keep the cultures from contaminating the wine fridge.
The first thing I had to do to make it was pasteurize the milk since it's a soft cheese and isn't aged long enough. I really hate pasteurizing milk just because it can take so long but if I wanted to make this cheese I was going to have to.
 To
pasteurize you need to heat the milk to 145 deg F and hold it there for
30 minutes stirring to keep it evenly heated. I find that my floating
brewing thermometer works best for this but I have to rubberband it to
the stirring spoon because my pot isn't deep enough for it to float.
After the 30 minutes is up you want to cool it off as quickly as
possible in an ice bath. I cooled it of to 86 deg F so I could inoculate
the milk without reheating it.
To
pasteurize you need to heat the milk to 145 deg F and hold it there for
30 minutes stirring to keep it evenly heated. I find that my floating
brewing thermometer works best for this but I have to rubberband it to
the stirring spoon because my pot isn't deep enough for it to float.
After the 30 minutes is up you want to cool it off as quickly as
possible in an ice bath. I cooled it of to 86 deg F so I could inoculate
the milk without reheating it.
This recipe required a Mesophilic DVI MA starter culture, Penicillum candidum and Geotrichum candidum, rennet and a brine solution.
Once the milk was down to 86 deg F I simply added the cultures, stirring until well blended. I then added the rennet stirring up and down. I left it overnight to firm up.
Without cutting the curds I scooped them into the molds filling them. The molds only took about 2/3s of the curds. I let the curds sit for just over 4 hours and then refilled the molds, packing the rest of the curds in. I allowed them to sit overnight to completely drain. The next morning I removed the curds from the molds and brined them for 10 minutes.
The brine was made up of 2 pounds of noniodized salt mixed into 1 gallon of water. Heat up the water until it's nearly boiling and mix in the salt until it's dissolved. When it cools some of the salt may precipitate out. You know the salt content is right when the cheese floats. If the cheese sinks there's not enough salt. This is good to know because you keep the brine to reuse - adding water and salt when needed. Over time it will develop it's own character from whey and cultures that are slowly added with each batch of cheese. Some cheesemakers have had the same brine for decades.
 After
I brined the cheeses I laid them on the cheese mats and put them in the
box. The first day I repositioned the cheeses several times. I put the
box in my wine fridge set about 55 deg F then for the next week I turned
them to make sure they were evenly drained and allowing the mold to
develop evenly over the cheese.
After
I brined the cheeses I laid them on the cheese mats and put them in the
box. The first day I repositioned the cheeses several times. I put the
box in my wine fridge set about 55 deg F then for the next week I turned
them to make sure they were evenly drained and allowing the mold to
develop evenly over the cheese.
 After
three more weeks of aging the cheese was ready. It was distinctively different from brie though being quite a bit stronger.
It's not creamy like brie either. It's a delightful cheese that I will
make again.
After
three more weeks of aging the cheese was ready. It was distinctively different from brie though being quite a bit stronger.
It's not creamy like brie either. It's a delightful cheese that I will
make again.
This month, however, we're going to be working with acid, rennet, cultures and mold! Yes, you heard that right. Mold. Mold is what makes brie such a wonderful gift from heaven. It's what makes blue cheese blue. Molds help the cheese develop more flavor and can also act as an inhibitor of undesirable mold. Some molds, like the ones for brie and camembert are surface molds while molds for blue cheese work within. They effect the color, smell, taste and texture of the cheese.
Feel free to experiment. Cheesemaking.com has some recipes for the more common cheeses like brie and blue cheese. Also Home Cheese Making: Recipes for 75 Delicious Cheeses has quite a few recipes you can check out.
I made Bucheron which is basically a camembert made with goat cheese and aged for an extra long time. The form is also different as it's more of a cylinder rather than your typical camembert or brie shape. This cheese doesn't have the soft gooey insides that the other two are known to have and the flavor is much stronger. I'm also planning on trying out brie.
This recipe was going to take 3 days to make so I made sure to do it on a weekend I was going to be home for. It required 2 gallons of goat milk which was going to take us quite awhile to stockpile. To stockpile raw milk we simply froze quart jars of it as we collected it until we got all we needed.
I had 4 small molds for making chevre, which ended up being enough. Five molds probably would have been more ideal though because I was really having to cram the curds into the four to make them fit. I also needed cheese mats, and a food grade plastic box to allow the cheese to retain moisture and keep the cultures from contaminating the wine fridge.
The first thing I had to do to make it was pasteurize the milk since it's a soft cheese and isn't aged long enough. I really hate pasteurizing milk just because it can take so long but if I wanted to make this cheese I was going to have to.

This recipe required a Mesophilic DVI MA starter culture, Penicillum candidum and Geotrichum candidum, rennet and a brine solution.
Once the milk was down to 86 deg F I simply added the cultures, stirring until well blended. I then added the rennet stirring up and down. I left it overnight to firm up.
Without cutting the curds I scooped them into the molds filling them. The molds only took about 2/3s of the curds. I let the curds sit for just over 4 hours and then refilled the molds, packing the rest of the curds in. I allowed them to sit overnight to completely drain. The next morning I removed the curds from the molds and brined them for 10 minutes.
The brine was made up of 2 pounds of noniodized salt mixed into 1 gallon of water. Heat up the water until it's nearly boiling and mix in the salt until it's dissolved. When it cools some of the salt may precipitate out. You know the salt content is right when the cheese floats. If the cheese sinks there's not enough salt. This is good to know because you keep the brine to reuse - adding water and salt when needed. Over time it will develop it's own character from whey and cultures that are slowly added with each batch of cheese. Some cheesemakers have had the same brine for decades.


Thursday, March 1, 2012
Find Your Whey - March: Time to Get Cultured
It's March's Cheese Challenge. We finally have a name thanks to some brainstorming from Sean over at Punk Domestics. This month we're finally getting a bit of culture. We're going with soft cheeses so you won't need to worry about having a press yet.
So far we've done cheeses that are acidified with acids such as lemon juice and citric acid. Now we'll be using cultures that acidify cheese. There are two primary types of starters that come in two forms. The first type, which we'll be using this month, is the Mesophilic Starter. It prefers low-temperature cheeses. The second type is a thermophilic starter which is used to make high-temperature cheeses.
They both come in two forms a direct-set starter or a prepared starter. Direct set is by far the easiest type because all you need to do is add it directly to the milk. Prepared starters require a lengthy process to create, but they also ensure that you no longer have to buy the starter because, like yogurt, you can just keep it going. Unfortunately the prepared starter is only good for 3 days in the refrigerator and a month in the freezer.
There are several types of cheese you can make this month that will work. I'm going to be making a sun-dried tomato feta in olive oil.Unfortunately this must be aged for up to 4 weeks so I'll be posting about making it next month.
Other cheeses that you can make are (Cheeses that don't have links are found in the book Home Cheese Making: Recipes for 75 Delicious Cheeses ):
):
Chevre
Cottage Cheese
Cheese Curds
Cream Cheese
Neufchâtel
Gervais
Bondon
Swiss and French Style Cream Cheese
Don't forget to share your experiences!
So far we've done cheeses that are acidified with acids such as lemon juice and citric acid. Now we'll be using cultures that acidify cheese. There are two primary types of starters that come in two forms. The first type, which we'll be using this month, is the Mesophilic Starter. It prefers low-temperature cheeses. The second type is a thermophilic starter which is used to make high-temperature cheeses.
They both come in two forms a direct-set starter or a prepared starter. Direct set is by far the easiest type because all you need to do is add it directly to the milk. Prepared starters require a lengthy process to create, but they also ensure that you no longer have to buy the starter because, like yogurt, you can just keep it going. Unfortunately the prepared starter is only good for 3 days in the refrigerator and a month in the freezer.
There are several types of cheese you can make this month that will work. I'm going to be making a sun-dried tomato feta in olive oil.Unfortunately this must be aged for up to 4 weeks so I'll be posting about making it next month.
Other cheeses that you can make are (Cheeses that don't have links are found in the book Home Cheese Making: Recipes for 75 Delicious Cheeses
):Chevre
Cottage Cheese
Cheese Curds
Cream Cheese
Neufchâtel
Gervais
Bondon
Swiss and French Style Cream Cheese
Don't forget to share your experiences!
Monday, February 20, 2012
Catching some Levain (aka Sourdough Starter)
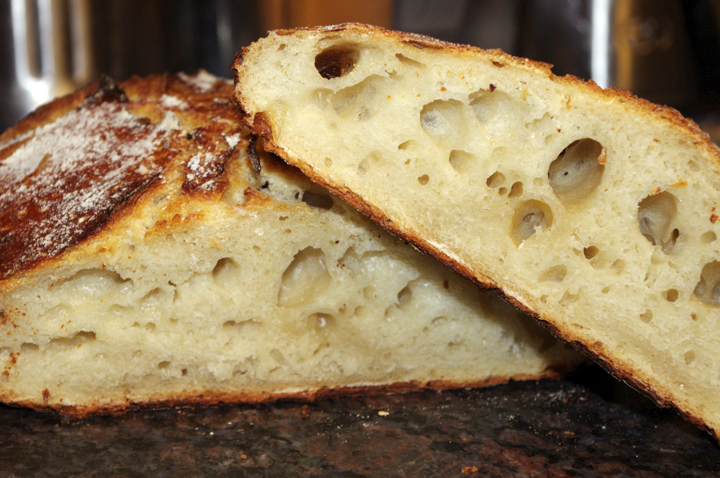 San Francisco is famous for their sourdough bread which runs wild around there. Fortunately we can all catch our own wild sourdough starter, which is also called levain. Levain is the French term for sourdough starter and has been used for centuries to make bread. Bread made with Levain may even be healthier for you than breads made with commercial yeast. Sourdough actually has a lower glycemic index than regular bread. The levain also breaks down phytic acid in grains. Phytic acid blocks the absorption of minerals and vitamins. Levain also shows promise for people that are intolerant of gluten because it helps degrade and deactivate the proteins that adversely affect people.
Nowadays you can purchase commercial sourdough starter, but what fun is that? Plus you can't boast that you actually caught the wild levain that made your bread. The bonus is that it's super easy to do and doesn't take much, but you don't have to tell others that. Go ahead and let them think it took you days of complicated procedures to obtain.
So are you ready to get blown away? To catch a levain all you need is some flour and an equal amount of water in a wide mouth container or bowl. Yep, that's pretty much all you need. And all you do is mix the flour and water together and set it outside for a couple of days. Bring it in, keep it in a relatively warm spot and once it starts to form bubbles on the surface you can go ahead and store it in the fridge. The only thing you do need to do is occasionally feed it equal parts of flour and water once a day. It should have a slightly sour smell to it, which is a good thing. You can keep your levain going for as long as you're willing to take care of it, or if something goes wrong like it gets moldy.
 So how do you use your levain? I like to make a nice no-knead artisan bread with it. The following recipe makes two loaves or one really big one if you're up for it. However, for a larger loaf the baking times will be longer.
In a large bowl mix together 3 cups warm water (about 110 deg F), 1-1/2 Tbs kosher salt and 1/2 cup of your levain. Add 7-1/2 cups flour and mix. It should be a wet dough, but not sloppy. When you measure the flour you want it to be level cups, which you can get by using the flat back edge of a knife to scrape excess flour off evenly. Cover and allow this to sit for at least two hours in a warm, dark spot.
This dough will not rise like breads made with commercial yeast so don't worry too much. After two hours you can put it in the fridge to store or make a loaf right away. The dough, because it's wet, is much easier to handle when it's cold though, so I usually put it in the fridge for about 2 hours before I plant to bake it.
When I'm ready I pull out half of the dough and while working quickly I shape it into a ball by pulling the top down over the sides stretching it. I then place this ball in a bowl that is lined with a heavily floured non-terry cloth towel. Sprinkle a bit of flour on top and then cover with the edges of the towel.
Allow it to rest and do a bit more rising for an hour. 40 minutes into the rise place a dutch oven (cast iron of course works the best, but you can use any type as long as it has a lid) in your oven and preheat to 450 deg F. The purpose of the dutch oven is to steam the bread for the first part of the baking. This helps develop a moist crumb while allowing for that real crunchy crust. Of course the heavier the lid the more steaming action you're going to get, which will further help develop larger holes in the crumb.
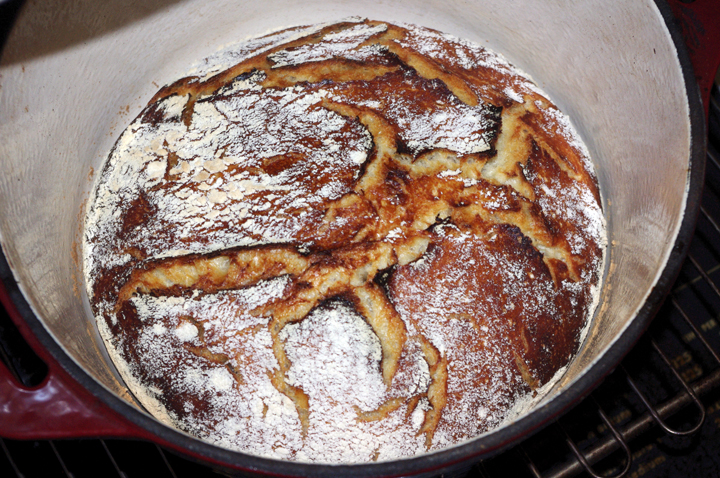 When you're ready to bake pull out the dutch oven and remove the lid. Pick up the towel and bread and quickly (and this can take some practice) and gently roll the dough out of the towel into the hot dutch oven. Quickly put the lid on and put it back in the oven.
Bake with the lid on for 30 minutes then remove the lid and bake for an additional 30 minutes or until the crust is completely browned. Don't overcook though as the bottom can and will burn if left too long.
When you're ready to bake pull out the dutch oven and remove the lid. Pick up the towel and bread and quickly (and this can take some practice) and gently roll the dough out of the towel into the hot dutch oven. Quickly put the lid on and put it back in the oven.
Bake with the lid on for 30 minutes then remove the lid and bake for an additional 30 minutes or until the crust is completely browned. Don't overcook though as the bottom can and will burn if left too long.Remove the bread from the dutch oven and place on a cooling rack. Allow to cool until you can handle it and then serve. You have now mastered the no-knead artisan bread.
A note about ovens and not getting the perfect loaf. Every time I did this recipe it came out well, but not as good as I knew it could be. I always thought I was doing something wrong. When we got our Wedgewood I quickly realized that not all ovens are created equal. Our previous, cheapo oven just couldn't do the job and it had made me feel inadequate. So if you have a hard time making that perfect loaf of bread it may not be your fault at all, but rather the oven that you are using.
Tuesday, January 31, 2012
February Cheese Challenge - Working with Rennet

Rennet is made up of enzymes that coagulate the milk proteins. Before the laboratories of today, cheesemakers would slaughter a calf or kid, salt and dry the stomach and then would break off a bit of it when it was needed. They would soak this bit of stomach in some water and then add the water to their milk. I've heard one story that cheese was first discovered when a nomad carried milk in a calf stomach which coagulated milk.
The ancient Romans used an extract from the fig tree to coagulate milk. Several other plants contain the enzymes needed for curdling milk including stinging nettle, our lady's bedstraw, thistle flowers, and butterwort. Vegetable rennet is currently available for use if you don't want to use animal rennet, however aging a cheese made with vegetable rennet can become bitter.
 |
| Don't worry if the rennet tablet doesn't completely dissolve |
So you can find animal and vegetable rennet. You can also find it in liquid and tablet form. Either form you will need to dilute before adding it to the milk so as to get a consistent curdle. When diluting the rennet you must use unchlorinated water. Chlorine, which is a very common additive in tap water, destroys the ability of the rennet to curdle milk. Use bottled or distilled water.
 |
| The milk has set correctly if you can cut it with a knife |
You can use just about any type of milk for this EXCEPT Ultra-Pasteurized. The high temps used when ultra-pasteurizing milk destroys the proteins and you'll end up with ricotta instead of mozzarella.
 |
| With a long knife, cut the curd |
Now that you've got your rennet, citric acid and milk together and you have all your equipment let's make some cheese!
1. Dissolve 1-1/2 tsp citric acid in a 1/4 cup unchlorinated water.
2. Dissolve 1/4 tablet of rennet or 4 drops of liquid rennet in 1/4 cup unchlorinated water.
 |
| Draining the whey from the curds |
4. After 5 minutes check to see if the curd easily separates. If it doesn't wait a few more minutes.
5. Cut the curd into 1" squares.
6. Slowly heat the curds up to 105 deg F while gently stirring them.
7. Once they've come up to temperature ladle the curds into a colander lined with cheesecloth and allow the curds to drain. Save the whey though! We want to make ricotta from it.
 8. Transfer curds into a microwave safe bowl and heat in the microwave for 1 minute. Drain the whey off. You'll want to wear gloves now because the curds will be really hot.
 9. Add and knead in 1 tsp salt or herbs to taste and microwave for another 30 seconds.
10. Now comes the fun part of stretching the mozzarella. Stretch it and stretch it some more. Kind of like taffy.
11. The more you stretch it the firmer the final product will be. I like to stretch it for quite awhile so that it is easier to slice when it's cooled off.
12. Once you're happy with the consistency you want to make it into a ball (or several if you wish) and immediately drop them into a bowl of ice water to cool the cheese off as quickly as possible. A slow cooling will leave you with a grainy texture so this step is a must if you want a nice smooth mozzarella.
13. Of course, now that it's cooled you'll want to slice a bit off to taste! Go ahead and enjoy it. Let us know what you end up doing with it.
We ended up using ours to top a lasagna and also a potato casserole I made later in the week. For the lasagna I also needed ricotta cheese. So this is how I made that.

Turn the heat off and simply strain through butter muslin (or sometimes I like to use coffee filters). I usually have to strain the ricotta overnight to get the desired consistency that I like. Once it's done straining add salt to taste and you're all done! You now have two cheeses from one gallon of milk!
Sunday, January 29, 2012
Getting a Head Start on Summer with Limoncello
 There isn't quite anything like sipping on ice cold limoncello after dinner with good friends on a hot summer night. It does take time to make so you'll need to start now to have a good batch of it ready to go for those summer nights.
Limoncello used to be hard to find but is gaining in popularity, however the good stuff is never cheap. You can easily make it at home and it tastes so much better. It's great to start now when you are probably drowning in extra lemons that you don't know what to do with. I prefer to use Lisbon or Eureka lemons over Meyer lemons. The Meyer's just don't offer the real lemony taste that I feel this drink calls for. Plus you would need about double the amount of Meyer's as they tend to be much smaller.
The longer you let the mixture sit, the flavor will intensify but the alcoholic "zing" will mellow. I like to go about 20 days on each rest period to allow it to mellow while also having some intensity.
There isn't quite anything like sipping on ice cold limoncello after dinner with good friends on a hot summer night. It does take time to make so you'll need to start now to have a good batch of it ready to go for those summer nights.
Limoncello used to be hard to find but is gaining in popularity, however the good stuff is never cheap. You can easily make it at home and it tastes so much better. It's great to start now when you are probably drowning in extra lemons that you don't know what to do with. I prefer to use Lisbon or Eureka lemons over Meyer lemons. The Meyer's just don't offer the real lemony taste that I feel this drink calls for. Plus you would need about double the amount of Meyer's as they tend to be much smaller.
The longer you let the mixture sit, the flavor will intensify but the alcoholic "zing" will mellow. I like to go about 20 days on each rest period to allow it to mellow while also having some intensity.
Ingredients
- 18 Lisbon or Eureka lemons, washed and dried
- 2 750mL bottles of 100 proof vodka (I prefer Stolichnaya)
- 5 cups of water
- 4 1/2 cups raw sugar
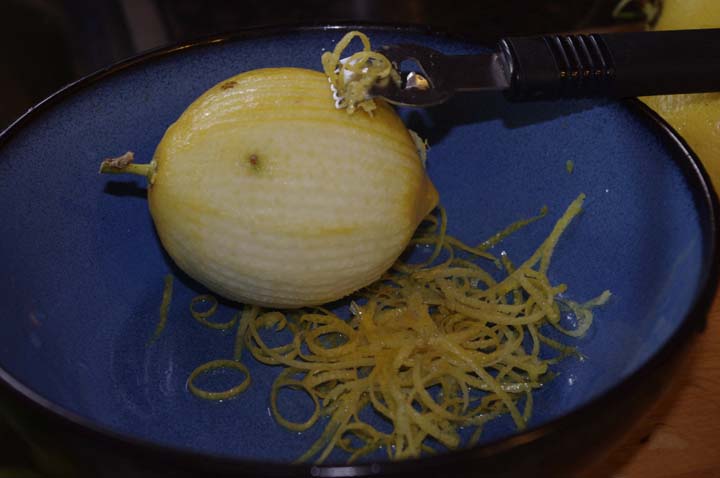
1. Avoiding the pith (white part of the peel) remove the lemon zest with a sharp knife or zester into a large glass or ceramic pitcher.
2. Pour one 750mL bottle of vodka over the zest, cover tightly and store in a cool dark place for 15-30 days.
3. In a saucepan combine water and sugar and heat until sugar is completely dissolved. Allow to cool.
4. Add syrup and remaining vodka to the lemon zest and vodka mixture. Cover and let sit again in a cool dark place for 14-30 days.
5. Strain mixture into glass bottles and store in a cool dark place or give away as gifts.
6. Refrigerate before serving or pour over ice. A little goes a long way so I recommend serving it in cordial glasses.
Sunday, January 22, 2012
Tom's Spicy Tomato Sauce
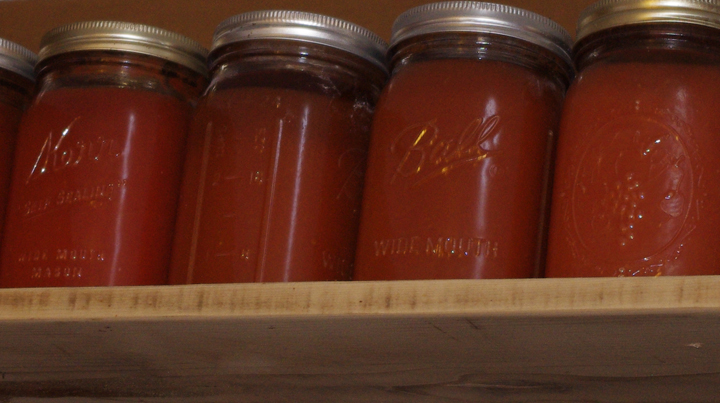
On Our first date Tom made me dinner at his apartment. It was a simple yet tasty dinner but I was most impressed that not only that he could cook but also that he enjoyed it. One of his best dishes was spaghetti sauce from scratch. Everyone who ever tries it raves about it.
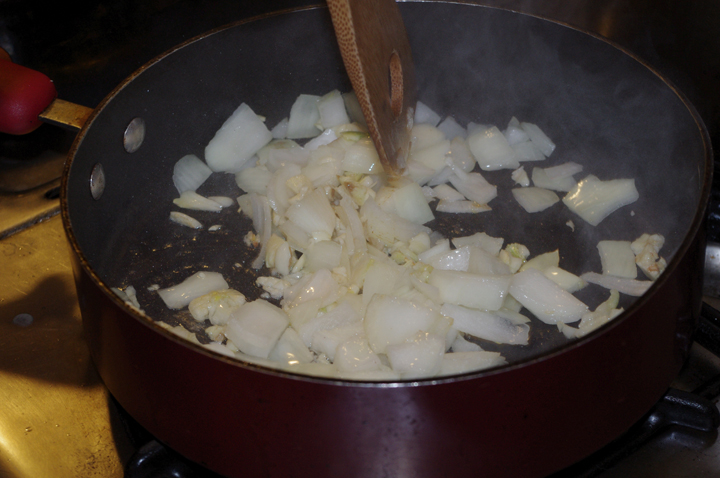
Over time his recipe has improved. Fresh herbs and homemade sauce from our garden replaced the commercial sauce and dried herbs. The season really depends on all that we put in it. During the winter we don't have peppers, zucchini, or eggplant available. So instead we just add more onions and mushrooms.
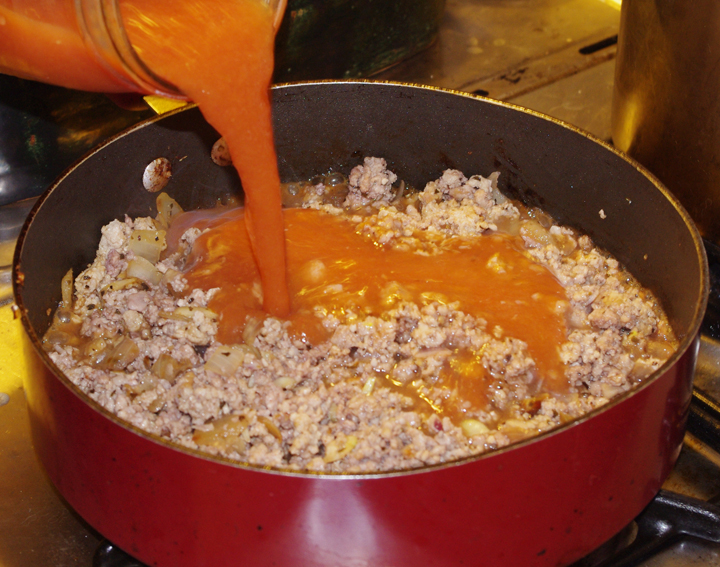
The secret ingredients in this sauce are the hot sauce and the sugar. Tom didn't really want me to share, but then why would you make this recipe if it was just so-so? The hot sauce adds some heat along with some extra acid. We generally like to use Tapatio. I think Tabasco would be too vinegary for this sauce though.
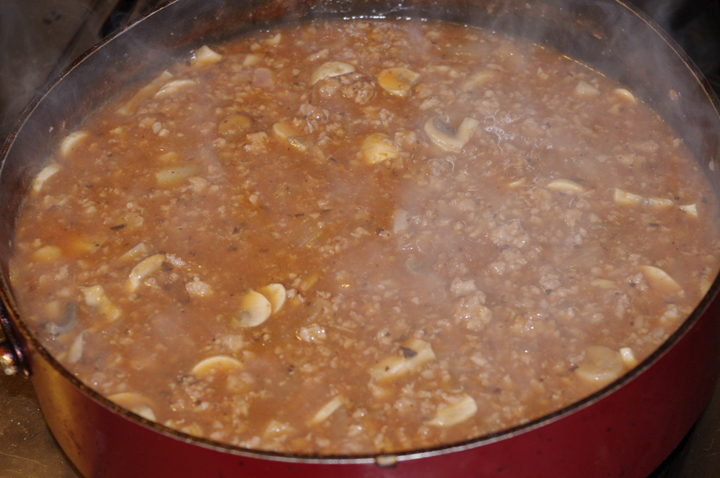
- 4 c tomato sauce
- 1 c tomato paste
- 1/4 c red wine
- 1 c water
- 1lb sausage, removed from casings or ground meat
- 1 onion, chopped
- 3 cloves garlic, minced
- 1 zucchini, cut in half and sliced
- 8 oz mushrooms, sliced
- 1 small eggplant roughly chopped
- 1 bell pepper chopped
- 2 Tbs Olive Oil
- 2 Tbs Hot Sauce
- 2 Tbs chopped fresh basil
- 1 Tbs chopped fresh rosemary
- 1 Tbs chopped fresh Thyme
- 1 Tbs chopped fresh Oregano
- 1 Tbs sugar
- Salt and Pepper to taste
2. Deglaze with the red wine.
3. Add the remaining ingredients and bring to a boil. Reduce to a simmer and cook until vegetable are tender and the sauce has thickened.
4. Serve over fresh pasta or add to a lasagna (I've been known to eat it on it's own).
Subscribe to:
Posts (Atom)