Showing posts with label Charcutepalooza. Show all posts

Tuesday, June 14, 2011

Adventures in Sausage - My Husband Doesn't like Stinky Cheese

Mmmmm, rabbit
 We've got so much rabbit and so very little freezer space right now, with more rabbits on the way. We needed to do something with all this rabbit and let's face it, I'm getting a little tired of just braising it.

Rabbit's a very lean meat and can be quite tough if it's not cooked right, which usually means either cooked very quickly or cooked for a very long time at a low heat. Since Tom is rather squeamish about rare or even medium rare meat, we have to go with the long cook time.

Grinding is a great way to deal with tough meats

However, there is another way you can prepare tough meat. Tough cuts from any animal whether it's beef, pork or rabbit lend themselves very well to grinding.

Not really wanting to make rabbit burgers and being that the current Charcutepalooza challenge is stuffed sausages I decided that rabbit would be the meat of choice for this challenge.

Pork fatback
But of course it wouldn't just be rabbit. Because sausage needs 25-30% fat I needed to add pork fatback. But I didn't stop there. My goal was a very flavorful sausage so it had to have asiago cheese and porcini mushrooms. But wait! It needed something more! Garlic! Yes garlic.


Unfortunately, Tom proclaimed that it smelled like a foot. He said the cheese smelled like a foot. The mushrooms smelled like a foot and now the fridge smells like a foot. Tom does NOT like stinky cheese, which, in my opinion, is quite a shame. I'm hoping this recipe works for him.


Unfortunately we're out of fresh garlic, but we have some really good dried garlic. So here's my recipe:

Rabbit Sausage with Porcinis, Asiago and Garlic
2 Whole Rabbits (3-3 1/2 lbs each), deboned and cut into 1/2" chunks
1 1/4 lb pork fatback, cut into chunks
1/2 lb Asiago cheese, cut into chunks
1.5 oz dried porcini mushrooms
3 Tbs dried minced garlic
3 Tbs Kosher salt
10+ feet of pork casings (optional)

1. Rehydrate mushrooms in 2 cups hot (not boiling) water. Put mushrooms in water into fridge overnight to chill.

2. Drain mushrooms reserving 1 cup of liquid. Return liquid to fridge.

3. Combine everything but the liquid in a large bowl and put in freezer until very cold, just short of freezing solid. Also freeze the detachable parts of meat grinder that will be coming into contact with the meat.

4. Reassemble meat grinder and run meat mixture through and into a bowl set in ice (I use the bowl to our stand mixer). I use the smallest die that came with the grinder.

5. Using my stand mixer (mine is the smaller Kitchen Aid mixer so I have to do this in batches), I quickly mix half of the ground meat adding 1/2 fo the reserved mushroom liquid to evenly distribute the spices. I repeat with the second half and then combine it all in one large bowl. Don't overmix or you'll end up with an emulsified sausage - mix just enough to distribute everything evenly.

6. Cook a small patty to check and adjust seasonings as needed. Return to the freezer to chill again.

7. You can choose to stop here and use it to make breakfast sausage or you can stuff it into casings.

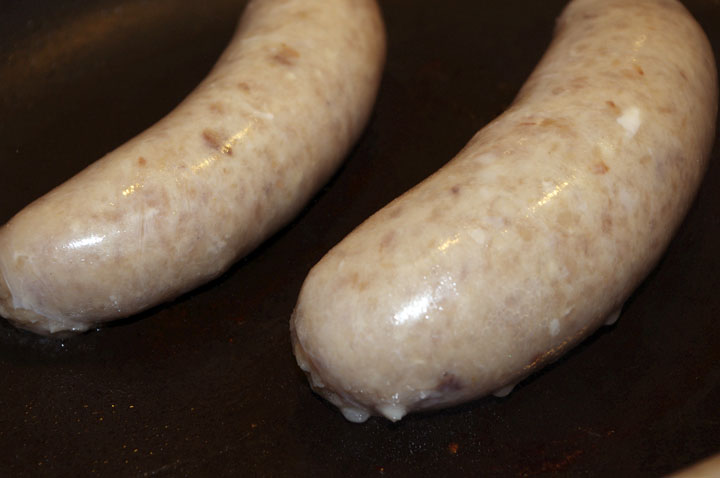
I have to admit, or more like my husband has to admit, smelling like a foot can sometimes be a very good thing. The porcinis I feel are a bit overpowered by the garlic and asiago though, so I think next time I'll save my money and omit them.

So what did we do with the sausages? We've added them to spaghetti sauce and lasagna. We've eaten them on homemade rolls with homemade sauerkraut and eaten them as snacks when out and about. I even add them to soup. Sometimes you don't need a special recipe to use them because they are the special recipe.

Tuesday, April 12, 2011

Going Whole Hog - The 27lb Ham

 Back in early September we had bought 1/8 of a steer. It equaled about 40 lbs of beef. We finally finished it off at the end of February. This time we decided to go a bit bigger but with a meat that we prefer over beef - pig. The bonus of doing pig is that we can also utilize it for Charcutepalooza.

We were originally going to raise our own hogs on someone's rural property but when that didn't seem to pan out we decided to just buy a live hog from someone that had already raised it to market weight. We were lucky to find an organic dairy farmer that just so happened to raise 4 hogs as a side project. The hogs were fed all organic feed. The hogs were large, but we weren't prepared for the actual weight. We were thinking the one we picked was maybe 250lbs live weight. Turns out it was closer to 450lbs. Yeah, we were just a bit off. The hanging weight on the hog was 287lbs.

I was definitely looking forward to curing the 25lbs of pork belly into bacon and pancetta. We have the head so I can make giancale or even head cheese. The butcher left us the shoulders whole so we can make sausage.

But this month's challenge for Charcutepalooza was a hot smoke. The example used for hot smoking was Canadian bacon. Our butcher, unfortunately cut the tenderloins into chops so we couldn't make Canadian bacon. So we decided to go with a whole ham. The hams weighed 27lbs. Go big or go home right?

Removing the aitch bone

We cut the hock off of the ham, removed the aitch bone and then brined it. After removing the hock and aitch bone we got it down to 25lbs. We brined it for 14 days. The directions said half a day of brining per pound for an American Style Holiday glazed ham. Unfortunately, even with the extra day and half of brining and doubling the brine recipe, when all was said and done, this wasn't long enough. The interior of the ham didn't get cured. Oh well, it's still very tasty.

Cat is eyeing the ham
We have a lot of applewood stacked in our yard from a friend's tree. We decided to use that for the smoking. The ham barely fit in our smoker. After 2 hours I glazed it. To reach the required 155 deg internal temperature it took 13 hours to hot smoke. Poor Tom, after hunting all day on Saturday had to get up at 3am on Sunday to pull it out of the smoker and do the final glaze. But it came out amazing! It's smokey with a subtle salty sweetness. I'd never had real ham - only the highly processed stuff that people serve on the holidays. This is how ham is supposed to taste like.


We did a very simple meal. We fried up some slices and served it up with some fresh fried eggs from our hens for a Sunday morning breakfast. The weather was lovely so we could eat outside. Sometimes the simple meals are the best tasting.

Sunday, March 6, 2011

When Perfection is Improved

Corned Beef. That vacuum packed brisket held in some sort of liquid with spices. Usually you can only make out the mustard seed and crumbled bay leaves. I never really thought about what went into corned beef but I knew the history behind the name. The "corned" refers to the salt the size of corn kernels used to cure it. The salt wasn't named after corn though. Corn was named after the salt, as corn's traditional name is "maize." The word "corn" is actually Germanic in origin. When maize made it's way to Europe they called it corn because the kernels resembled the salt used to cure corned beef.


Today corned beef is brined and then boiled instead of corned with dry salt. But growing up I didn't care how it was made. I just loved it. It was by far one of my favorite foods. Always served on St. Patrick's Day with cabbage, potatoes and carrots. One of the things that made it so special was that this was the only time of year we got to eat it. My family does that. We take one meal and only serve it one time of year. Every Christmas eve we would have a crab feed. The only time of year we'd eat crab. It made it a tradition. Something special. Corned beef is just as special.


When the March Challenge for Charcutepalooza was announced I was excited! I would learn how to make this nostalgic hunk of meat. I've brined before. Actually, every year we brine a whole turkey for Thanksgiving. You can find my recipe here. I HIGHLY recommend you try the next time you serve a whole turkey, whether it's for Thanksgiving or for any other meal. You will not be disappointed. Since I have experience brining, it meant that I could do the Charcuterie Challenge rather than the Apprentice Challenge.


Making the corned beef looked ridiculously easy. Because it's so easy, the instructions were to make your own pickling spice. Seemed fair enough. Well, as it turns out, while I was writing down the list of spices and herbs to get, I wrote "ginger" twice and forgot to write down "cloves." I didn't realize this until I was dumping spices into the bowl to create the pickling spice. Doh! We were out of whole cloves so instead I made the decision to go with ground cloves. Ground cloves are ridiculously strong compared to their whole counterparts. This was definitely a gamble, but it was a bet I was willing to make.

After a week in the fridge soaking in brine I pulled out the brisket. I was dismayed to see it come out looking gray and unappetizing. I didn't even take a picture of it. But I wasn't going to give up. It was ready before we could cook it for the required 3 hours, so I dumped the brine and recovered the brisket with some fresh, cool water until the weekend when we could cook it. That coming Saturday morning we stuffed it into our slow cooker and covered it with some of the water it had been soaking in. We set the slow cooker on high for 2 hours and then on low for the next several hours. Around 4pm I pulled it out and put it in a dutch oven with the remaining liquid, some more water, potatoes, cabbage and carrots. We of course had to have a traditional meal with part of it. The rest of it when into the fridge for Monday's dinner.


I pulled the brisket out and cut it. It was that lovely red color I was hoping for. No longer was it gray. The flavor? Perfection perfected. The cloves gamble was well worth it. You could taste the cloves, but they weren't overpowering. It was by far the best tasting corned beef I had ever tasted.

The following Monday evening we decided to make sandwiches, another common way to eat corned beef. But we didn't just go for regular corned beef, swiss cheese, and sauerkraut on rye. Oh no. We first started by making homemade garlic mayonnaise with green grapeseed oil.


We fried up slices of corned beef in bacon grease and then fried up an egg from our hens in the remaining grease.

 We slathered the mayonnaise on some toasted Amber Ale Bread that we had picked up at Model Bakery, added the corned beef, egg, and topped it off with a sliced lacto-fermented pickle I made this past summer. We served this amazing tasting sandwich with fried potatoes and kale chips we made earlier in the week.

Monday, February 14, 2011

Fennel Challenge: Bacon Wrapped Braised Rabbit with Fennel

Just the first challenge of Charcutepalooza and I'm finding myself inspired. Inspired to take chances with cooking. It also inspired me to take on my own challenge. Each month I will take a new ingredient - one I'm not familiar with but is readily available at our farmers' market or in our garden (yes, I'm growing things that I've never even tasted before - such as salsify) and create one dish a week with it.  They will be completely my own. I will take inspiration from other places - be it online or in cookbooks - but they will not be the same. Some may be spectacular and some might be total flops. But I will post them here. I will take chances and no longer be intimidated by foods I'm not familiar with.

This month I chose Fennel - by accident really. It had always intimidated me - which makes the challenge that much more interesting. To be honest, I had only eaten Fennel twice and both times it was marinated (great recipe by my friend Leslie that I would love to get from her sometime).  While last week's recipe included the bacon I had cured, I wanted something that incorporated more bacon! We also had a fresh rabbit in the fridge waiting to be eaten.

So I set out to combine fennel, bacon and rabbit. In my opinion, the dish was simply ok. Nothing spectacular. Tom, however, practically licked his plate clean. I guess, for me, the problem was the bacon <gasp>. I've never been one to like to eat animal fat. I always trim it off of meat. I only like my bacon cooked until extra crispy. So with this dish, the bacon is not crispy, so I didn't really get to enjoy it as fully as someone that likes to "chew the fat" so to speak. However, if you like your bacon anyway you can get it, then you may actually enjoy this dish, like Tom did. I do have to say that the rabbit came out great and the fennel added a subtle touch of acidity. The bacon fat did help it quite a bit, since it is such a lean meat. We served this recipe with mashed sweet potatoes and sauteed Swiss Chard with garlic.

Ingredients

1 dressed rabbit - 3 to 3 1/2 lbs
1 c flour
1 Tbs Marjoram
1 Tbs Garlic Salt
1 tsp fresh ground black pepper
3 Tbs oil (we used bacon fat)
12 slices of bacon
2 fennel bulbs, thinly sliced
1 Tbs Herbs de Provence
1 c chicken stock
1 c white wine


1. Preheat oven to 350 deg. F. Butcher the rabbit into 6 pieces.
2. Add oil to a dutch oven over medium heat. Combine the flour, marjoram, garlic salt and pepper. Dredge rabbit pieces in flour mixture and sear in dutch oven, placing done pieces on a paper towel lined plate until all pieces are seared.
3. Place as many pieces of rabbit on the bottom of dutch oven as possible. Cover each piece with 2 slices of bacon and then half the sliced fennel. Repeat with second layer of rabbit.
4. Sprinkle Herbs de Provence over fennel and then pour over chicken broth and wine. Cover and place in oven. Cook for 1 hr 30 min.
5. Let rest for 5 min. then serve.

Tuesday, February 8, 2011

Fennel Challenge: Cream of Roasted Fennel Soup with Bacon!

So what to make with that bacon? Honestly, we could just fry up slices and eat it straight. But Charcutepalooza is inspiring me to come up with interesting recipes.

A friend of ours accidentally left some fennel bulbs from the farmers' market in our fridge. Not knowing when we'll see each other next she said to go ahead and use them. Hmmm. I've never cooked with fennel before. Well, here goes nothing!

Ingredients:

2 fennel bulbs, bottom trimmed and stalks cut off reserving leafy tops
1 onion, coursely chopped
olive oil
salt
1/4 lb bacon slices
1 tsp cumin
1/2 tsp caraway seeds
4 cups chicken broth
2 large yukon gold potatoes
1/2 cup milk
1/2 cup half and half

Instructions:
1. Preheat oven to 375 deg F.
2. Cut fennel bulbs in 1/2" slices. Put fennel and chopped onion on a cookie sheet. Drizzle with olive oil and sprinkle with salt. Roast for 25 minutes or until tender and slightly browned.
3. Divide the bacon in half. Leave one half in slices and cut other half in 1/4" chunks. In a dutch oven cook slices until crispy. Remove slices from heat and put on paper towel to cool. Cook bacon bits in a fry pan until crispy. Put slices on paper towel to cool.
4. In dutch oven with bacon grease from slices add cumin and caraway seeds. Cook until fragrant - about a minute.
5. Add chicken broth, potatoes, fennel and onions to dutch oven. Bring to a boil and reduce to a simmer. Cook on medium high until potatoes are tender. Add bacon chunks, milk and half and half and use an immersion blender or food processor to make soup smooth.
6. Serve with a garnish of bacon slices and fennel leaves.

Remember the Bacon


Tasty tasty bacon. Saturday morning I finished the bacon. I pull out the pork belly. It had changed texture and color slightly. The belly was definitely firmer and the color redder. I rinsed off the spiced, herbs and residual salt. I then put the belly on a cookie sheet and put it in the oven. The instructions said to slow roast it at 200 deg F. Unfortunately the lowest setting for our oven is 260 deg F. It still took 90 minutes for the internal temp to reach 150 deg F.


Holding myself back, I put the bacon in the fridge to cool. By lunch time it was ready. I cut a slice for everyone to try. Cooked it up crisp. Yum! Something I will definitely be making again. Next time I plan to smoke it.

Friday, January 28, 2011

Bacon Day 1

I guess you can say I just jumped right in head first. After deciding to be part of Charcutepalooza's February Challenge I immediately went to the Fatted Calf and bought 5 lbs of pork belly. I then ran over to the Oxbow public market to the spice merchant, World Spice. I bought curing salt, kosher salt and juniper berries. I knew we had everything else that I would need to make this bacon.

I walked into the Fatted Calf in Napa. It's usually pretty busy when I go in but they helped me right away. I ordered the pasture-fed heritage pork belly.  What I like about getting meat is that I know the animals were treated humanely - one of the rules, as it turns out of the Charcutepalooza. I go to the Fatted Calf at least once a week and we've chatted with the butchers there, so I'm a bit surprised that they don't recognize me yet. I didn't get to view the beauty of the pork belly until I got home. I opened up the butcher's paper and angels sung. It was beautiful.


I then mixed up the spice mix. I followed the above recipe but I also added a bit of cajun seasoning to kick it up a bit. I'm a bit worried about the juniper berries though because whenever I drink gin I puff up a bit. I don't regularly eat juniper berries, so honestly I could be totally fine. 


Clockwise from the top we have juniper berries, crushed garlic cloves, curing salt (it's pink to let you know not to eat it), kosher salt, ground nutmeg, pepper with fresh thyme and bay leaves, brown sugar with a dusting of cajun spices. 


I then mixed all of the spices and salts and rubbed the pork until it started to become moist. I then covered it with some plastic wrap in a pyrex baking dish. It will sit for a week getting massaged occasionally until day 7 when I roast it. I'm looking forward to having fresh bacon next weekend for breakfast!