We've covered several different cheeses now, including the basic mesophilic hard cheese, which I'm sure you've got aging right now. This month we're going to kick it up a notch and try our hand at cheddaring - which isn't just for cheddar. Cheddaring is the process of cutting the drained curd into strips and
allowing them to set at 100 deg F for 2 hours.There are actually several
different cheeses that are cheddared including Derby and Leicester and of course Cheddar.
There are several ways to make cheddar. The shortcut is farmhouse cheddar, a more involved way is stirred-curd cheddar and then there's the more challenging traditional cheddar. The first two do not actually involve the process of cheddaring but you can choose any of these depending on how comfortable you feel. You may have already tried cheddar last month. If you tried farmhouse cheddar then try a harder one to make. If you went all out and did traditional cheddar then this time make a flavored cheddar - jalapenos, sage, caraway, horseradish - or try one of the other cheeses that involve cheddaring.
Cheddar, which dates back to the 16th Century, takes its name from a small village in Southern England. Legend has it that a Stone Age skeleton was found in ancient caves over the Cheddar Gorge. Above it's head hung a vessel of goat milk that had turned into a hardened into a pleasant tasting cheese. I don't know about you, but I'm pretty sure I wouldn't be tasting something thousands of years old.
Don't forget to share your cheesy adventures!
Showing posts with label Cheesemaking. Show all posts
Showing posts with label Cheesemaking. Show all posts
Friday, June 1, 2012

Monday, April 30, 2012
Finding Your Whey - May: The Hard Stuff
It's time to get serious about cheesemaking. This month we're going to be making hard cheeses! The first steps are very similar to last month's cheeses as we'll be using mesophilic culture to acidify the milk and rennet to coagulate the milk. These hard cheeses are generally much more involved than the previous cheeses we made. From start to end of pressing can take several days. I usually like to start making a hard cheese on a Friday afternoon so that I'm done by Sunday. Of course you don't have to be actively doing something with the cheese that entire time, but you do need to be around.
It's also time to add to your cheesemaking equipment the cheese press. You can purchase them from various online retailers but I've found the best deal at Hoegger Supply Company. You'll need to also make sure to get the pressure gauge so you know how much pressure you're applying. The other option is you can make one fairly easily. We made it and it cost about $30 plus the 2lb cheese mold I had to purchase separately. This press doesn't need the pressure gauge. Instead we use old gym weights we found for the press. We'll be aging these cheese for longer so you'll want to also get cheese wax and a wax brush.
I'll be making one of these cheeses with you (names that aren't linked can be found in Home Cheese Making: Recipes for 75 Delicious Cheeses).
Farmhouse Cheddar
Cheddar
Leicester
Monterey Jack
Drunken Goat
Manchego
Cantal
Caerphilly
Good luck! This is going to be a lot of fun!
Thursday, March 1, 2012
Find Your Whey - March: Time to Get Cultured
It's March's Cheese Challenge. We finally have a name thanks to some brainstorming from Sean over at Punk Domestics. This month we're finally getting a bit of culture. We're going with soft cheeses so you won't need to worry about having a press yet.
So far we've done cheeses that are acidified with acids such as lemon juice and citric acid. Now we'll be using cultures that acidify cheese. There are two primary types of starters that come in two forms. The first type, which we'll be using this month, is the Mesophilic Starter. It prefers low-temperature cheeses. The second type is a thermophilic starter which is used to make high-temperature cheeses.
They both come in two forms a direct-set starter or a prepared starter. Direct set is by far the easiest type because all you need to do is add it directly to the milk. Prepared starters require a lengthy process to create, but they also ensure that you no longer have to buy the starter because, like yogurt, you can just keep it going. Unfortunately the prepared starter is only good for 3 days in the refrigerator and a month in the freezer.
There are several types of cheese you can make this month that will work. I'm going to be making a sun-dried tomato feta in olive oil.Unfortunately this must be aged for up to 4 weeks so I'll be posting about making it next month.
Other cheeses that you can make are (Cheeses that don't have links are found in the book Home Cheese Making: Recipes for 75 Delicious Cheeses ):
Chevre
Cottage Cheese
Cheese Curds
Cream Cheese
Neufchâtel
Gervais
Bondon
Swiss and French Style Cream Cheese
Don't forget to share your experiences!
So far we've done cheeses that are acidified with acids such as lemon juice and citric acid. Now we'll be using cultures that acidify cheese. There are two primary types of starters that come in two forms. The first type, which we'll be using this month, is the Mesophilic Starter. It prefers low-temperature cheeses. The second type is a thermophilic starter which is used to make high-temperature cheeses.
They both come in two forms a direct-set starter or a prepared starter. Direct set is by far the easiest type because all you need to do is add it directly to the milk. Prepared starters require a lengthy process to create, but they also ensure that you no longer have to buy the starter because, like yogurt, you can just keep it going. Unfortunately the prepared starter is only good for 3 days in the refrigerator and a month in the freezer.
There are several types of cheese you can make this month that will work. I'm going to be making a sun-dried tomato feta in olive oil.Unfortunately this must be aged for up to 4 weeks so I'll be posting about making it next month.
Other cheeses that you can make are (Cheeses that don't have links are found in the book Home Cheese Making: Recipes for 75 Delicious Cheeses
):Chevre
Cottage Cheese
Cheese Curds
Cream Cheese
Neufchâtel
Gervais
Bondon
Swiss and French Style Cream Cheese
Don't forget to share your experiences!
Tuesday, January 31, 2012
February Cheese Challenge - Working with Rennet

Rennet is made up of enzymes that coagulate the milk proteins. Before the laboratories of today, cheesemakers would slaughter a calf or kid, salt and dry the stomach and then would break off a bit of it when it was needed. They would soak this bit of stomach in some water and then add the water to their milk. I've heard one story that cheese was first discovered when a nomad carried milk in a calf stomach which coagulated milk.
The ancient Romans used an extract from the fig tree to coagulate milk. Several other plants contain the enzymes needed for curdling milk including stinging nettle, our lady's bedstraw, thistle flowers, and butterwort. Vegetable rennet is currently available for use if you don't want to use animal rennet, however aging a cheese made with vegetable rennet can become bitter.
 |
| Don't worry if the rennet tablet doesn't completely dissolve |
So you can find animal and vegetable rennet. You can also find it in liquid and tablet form. Either form you will need to dilute before adding it to the milk so as to get a consistent curdle. When diluting the rennet you must use unchlorinated water. Chlorine, which is a very common additive in tap water, destroys the ability of the rennet to curdle milk. Use bottled or distilled water.
 |
| The milk has set correctly if you can cut it with a knife |
You can use just about any type of milk for this EXCEPT Ultra-Pasteurized. The high temps used when ultra-pasteurizing milk destroys the proteins and you'll end up with ricotta instead of mozzarella.
 |
| With a long knife, cut the curd |
Now that you've got your rennet, citric acid and milk together and you have all your equipment let's make some cheese!
1. Dissolve 1-1/2 tsp citric acid in a 1/4 cup unchlorinated water.
2. Dissolve 1/4 tablet of rennet or 4 drops of liquid rennet in 1/4 cup unchlorinated water.
 |
| Draining the whey from the curds |
4. After 5 minutes check to see if the curd easily separates. If it doesn't wait a few more minutes.
5. Cut the curd into 1" squares.
6. Slowly heat the curds up to 105 deg F while gently stirring them.
7. Once they've come up to temperature ladle the curds into a colander lined with cheesecloth and allow the curds to drain. Save the whey though! We want to make ricotta from it.
 8. Transfer curds into a microwave safe bowl and heat in the microwave for 1 minute. Drain the whey off. You'll want to wear gloves now because the curds will be really hot.
9. Add and knead in 1 tsp salt or herbs to taste and microwave for another 30 seconds.
10. Now comes the fun part of stretching the mozzarella. Stretch it and stretch it some more. Kind of like taffy.
11. The more you stretch it the firmer the final product will be. I like to stretch it for quite awhile so that it is easier to slice when it's cooled off.
12. Once you're happy with the consistency you want to make it into a ball (or several if you wish) and immediately drop them into a bowl of ice water to cool the cheese off as quickly as possible. A slow cooling will leave you with a grainy texture so this step is a must if you want a nice smooth mozzarella.
13. Of course, now that it's cooled you'll want to slice a bit off to taste! Go ahead and enjoy it. Let us know what you end up doing with it.
We ended up using ours to top a lasagna and also a potato casserole I made later in the week. For the lasagna I also needed ricotta cheese. So this is how I made that.

Turn the heat off and simply strain through butter muslin (or sometimes I like to use coffee filters). I usually have to strain the ricotta overnight to get the desired consistency that I like. Once it's done straining add salt to taste and you're all done! You now have two cheeses from one gallon of milk!
Sunday, January 1, 2012
January Cheese Challenge - Nothing but Curdled Milk

All of these cheeses use an acid to curdle the milk. There is no need to add cultures to make these cheeses.
Paneer is a traditional Indian cheese made with whole milk, lemon juice or vinegar.
Ricotta, which is traditionally made from the whey left over from making hard cheeses, can also be made with whole milk. Again, you use vinegar or lemon juice to curdle the milk.
Yogurt Cheese is simply that - cheese made from yogurt. It's also called Lebanah and is common in the Middle East and Greece. You simply strain plain yogurt until you create a cheese from it. The resulting whey I suspect you can make traditional ricotta from because the yogurt is cultured. By making traditional ricotta simply heat up the whey to near boiling. You'll see tiny specks develop which is the albumin protein separating out. This is what makes up the ricotta. Simply strain the whey again and you'll have a small amount of ricotta.
Buttermilk cheese can be made with whole milk, some cultured buttermilk and salt.

For this recipe I'll be using 1 gallon of raw goat milk, distilled white vinegar and kosher salt. This recipe doesn't require the milk to be raw because I will be heating it to a high temperature, which will basically pasteurize it anyways.
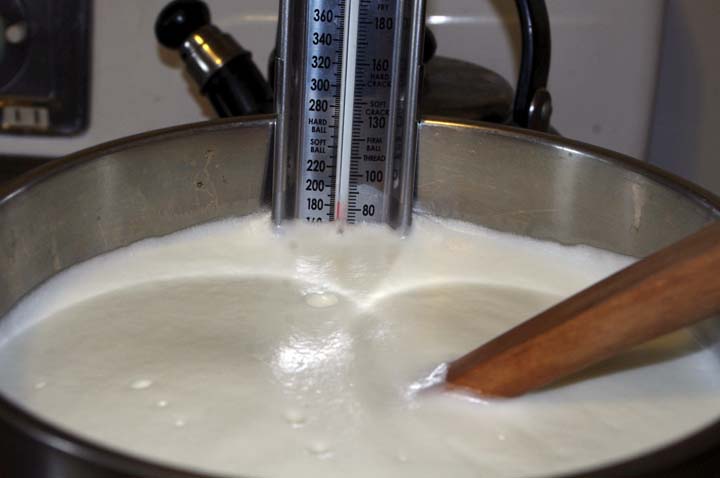
I started by heating up the milk to 185 deg F.You can bring it to boiling, but this imparts a cooked flavor to the milk which I would prefer to avoid.
Once it reaches 185 deg F I took it off the heat and stirred in 1/4 cup of vinegar (you can add an additional 1/4 cup slowly if you don't have curds yet). I slowly stirred until curds began to form. They are white masses and the whey that separates out will have a yellow color to it. I then allowed it to sit for 5 minutes to allow them to develop more and settle a bit.

I then strained the curds and whey through a cheesecloth lined colander over another pot. We save the whey and freeze it in ice cube trays to add to smoothies. I allowed the cheese to drain for 10 minutes. I then put the curds in a bowl and mixed in 1 Tbs of kosher salt. I took the cheesecloth, lined a cheese basket (mine came with the hard cheese kit I previously purchased from here) and put the curds in it. I gently pressed out a bit more whey and then put it in the fridge to chill. Once chilled I gently pulled it out and put the cheese on a plate.

We used some of this cheese our our pizza. This type of cheese doesn't melt. Also, it doesn't improve with age so it must be eaten fresh. If you can't eat it all fresh, you can freeze it, but the texture may change a bit.
So, your challenge is to choose one of the cheeses above to make. Feel free to build on the recipe by adding herbs and spices. Try new milks if you can find them, like sheep or goat. Then tell us what you did and how you used it.
I look forward to hearing how it goes!
Friday, December 16, 2011
The Cheese Challenge Part 3
I've been getting some questions about what books and supplies you'll need for the first challenge.
For the book I recommend Home Cheese Making
by Ricki Carroll. We'll be utilizing that for a lot of the recipes.
Our first month we'll be making fresh, soft cheeses that don't require any cultures. On January 1st I'll provide a list of the types of cheeses you can start with. Get creative. Add herbs and spices if you want. You won't need a press yet but you'll want to get some good cheesecloth or butter muslin
 .
For the book I recommend Home Cheese Making
by Ricki Carroll. We'll be utilizing that for a lot of the recipes.Our first month we'll be making fresh, soft cheeses that don't require any cultures. On January 1st I'll provide a list of the types of cheeses you can start with. Get creative. Add herbs and spices if you want. You won't need a press yet but you'll want to get some good cheesecloth
or butter muslin.
Monday, December 12, 2011
More on the Cheesemaking Challenge
First and foremost, we need a name. I'm drawing a blank so if anyone has one to offer share it!
The challenges will start out easy, making some type of cheese that can be made with common items you might find in your kitchen. They will be generalized so that you can make a cheese of your choosing with they type of milk you want.
I highly recommend purchasing a cheesemaking book. Fortunately the web is also filled with lots of recipes so it won't be absolutely required but it would be more helpful.
As the challenges move forward you'll need to get more specialized equipment and ingredients/starter cultures/etc. Of course, for items like a cheese press I will show you how we made ours at home for less than $50.
Part of cheesemaking requires somewhere that is cool (50 deg F is standard) and humid to age your cheese. Basements can work well. We use a wine fridge so if you're going to take on cheesemaking start looking on Craigslist for them. You can sometimes find good deals on them because a lot of people are getting rid of them. A mini fridge with a thermostat controller can also work.
Feel free to start with a cheesemaking kit as well. They have everything you need for at least some of the cheeses all together.
At the end of each month I want to see links to posts about your cheesemaking! Leave them on our FB page. I'll include a list on the blog of the bloggers that are taking part. If you're participating send me an email and I'll get your blog and/or name on the list!
I'm excited. Are you?
Tuesday, December 6, 2011
Blessed are the Cheesemakers

I am new to making cheese, but I love doing it! Once you have the tools you need it can be quite fun, though sometimes time consuming. But the resulting product is nothing short of amazing. There's something to be said about processing your own food.
So I'm taking a page from Mrs. Wheelbarrow and The Yummy Mummy with their Charcutepalooza: A Year of Meat. What better accouterments to go with cured meat than some cheese?
Starting January 1st I will post a new cheesemaking challenge. Join me in learning how to make cheese, talk about it, write about, take lots of photos. I'll post more about it in the upcoming weeks, but for now, consider this your warning.
Subscribe to:
Posts (Atom)